This post will discuss using Postman to work with Pure Storage FlashArray REST API endpoints.
It feels strange writing this post, given the name of this blog site, but not everyone wants to use Ansible for their automation toolset. Sometimes a home-grown solution is better at integrating infrastructure with existing CMDBs or other self-service portals.
So here I am going to discuss how to access the API endpoints available in a Pure Storage FlashArray that you can use to manage and maintain that platform. I’m not going to use the Python SDK, which I would normally suggest if someone wants to not use Ansible and write their own tool. But Pure only provides an SDK for Python and therefore creating a home-grown tool coded in GoLang or Ruby, for example, needs to use the raw APIs.
To show how easy it is to access the data from these endpoints I going to use Postman as my tool of choice to access endpoints.
Starting off
The first thing you are going to need is a username and password combination for a Pure Storage FlashArray, from which we are going to obtain an API token, which in turn will be used as authentication to access API endpoints.
There are a few ways, to get the API token you need from the FlashArray:
- You can use the GUI and go to Settings > Access, then in the Users pane select the burger icon for your username (right-hand side of the screen) and select “Create API Token…” (or “Recreate API Token…” if you have forgotten an existing token).
- Use the FlashArray Purity CLI. Useful commands are pureadmin create –api-token or pureadmin list –api-token –expose.
- Use Postman to get the API token.
As we are discussing direct API calls here, let’s start by discovering which REST versions are supported by a FlashArray. We’ll be using Postman for all our REST API calls.
Which REST API versions are supported in my FlashArray
It’s important to know this information as you will see later on, but it’s really easy to get this using a simple API call:
GET https://array1.acme.com/api/api_version
There is no need to pass any authentication tokens for this as it is an unauthenticated endpoint.
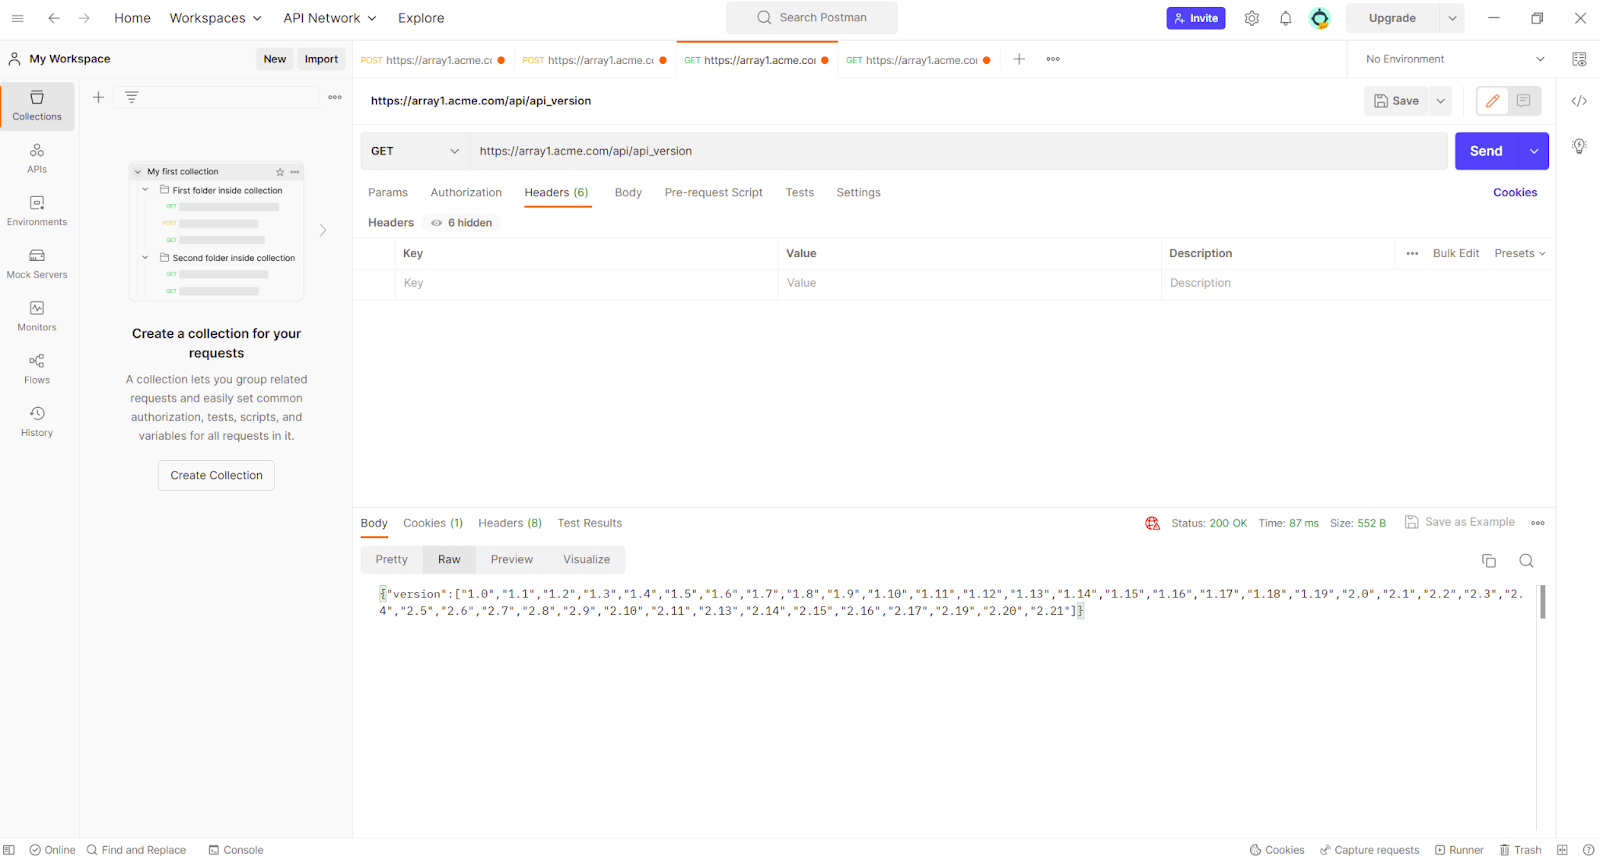
For the array, you can see the array’s highest REST version is 2.21 (corresponding to Purity//FA 6.4.2). If you tried to call any endpoint on this array using REST 2.22 or higher, you would get an empty response.
Now we know what our FlashArray supports from a REST perspective, let’s start to do some work.
The first thing we need to obtain is a REST API token to authenticate against the array. We’ll start by getting the API token for a user, in this case, one I created on the FlashArray earlier, called postman…
Obtaining a user REST API token
To obtain an API token for a user we first use the REST 1.x interface to the FlashArray and send, through the Postman interface, the following command:
POST https://array1.acme.com/api/1.0/auth/apitoken
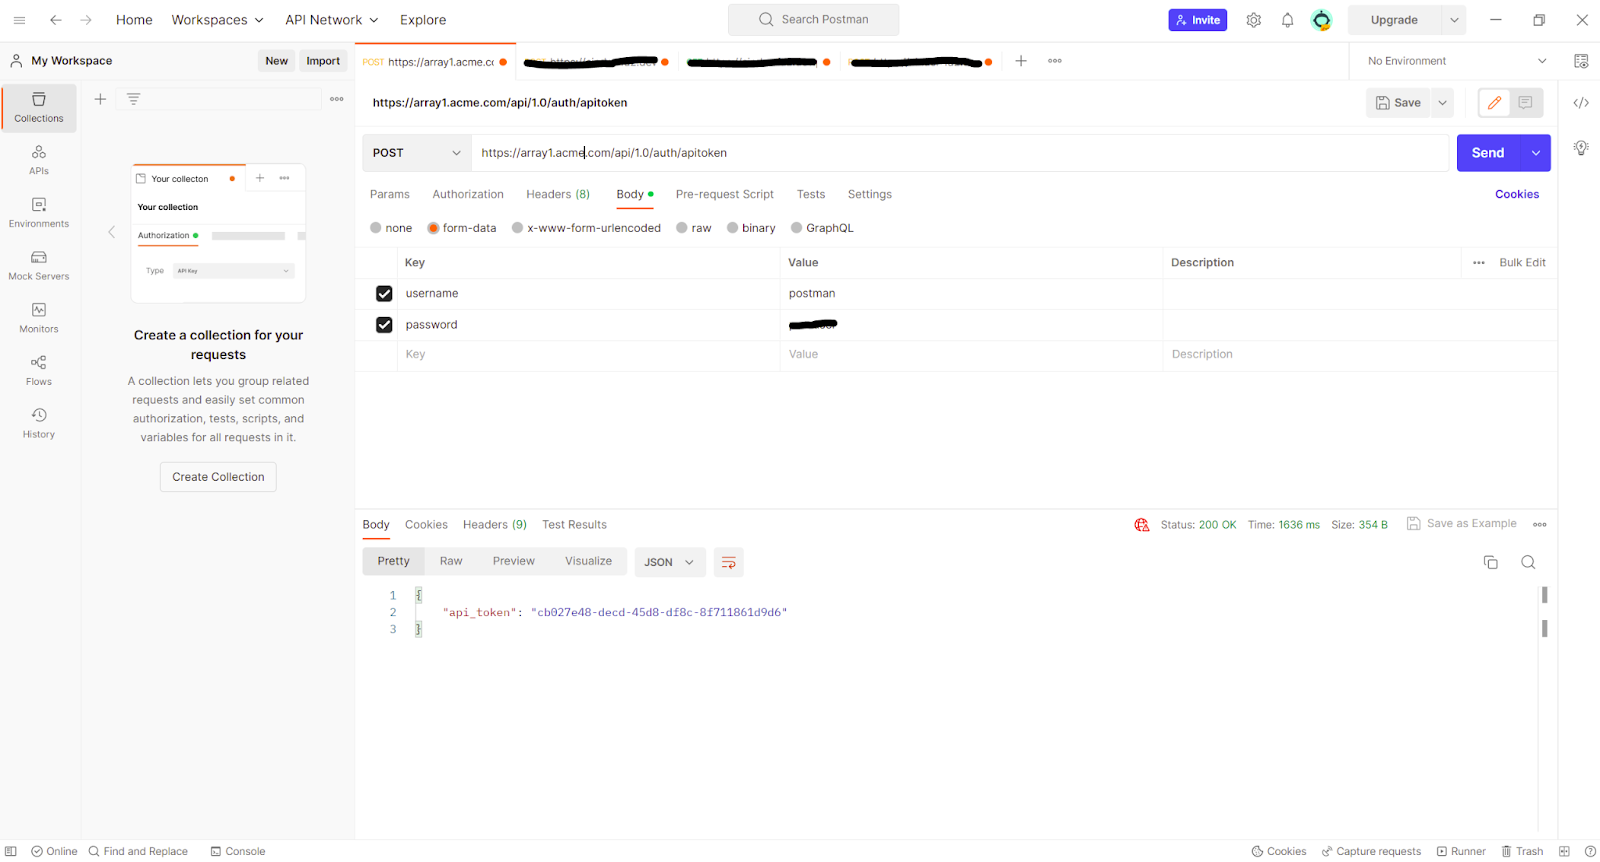
Provide the username and password in the form-data section of the Body tab.
Select Send and the API response containing your API token will appear in the response Body tab.
Save this API token as you will need it next to open an API session to the FlashArray.
Opening a REST API Session
With our API token, we can open an authenticated API session to the FlashArray, which will provide an authentication token, which will be used for any subsequent calls to the FlashArray in this session.
Now we use REST 2.x to get the session authentication token using a POST API call:
POST https://array1.acme.com/api/2.0/login
For this call we need to provide, in the Headers tab, the API token we just collected and set the Content-Type as application/json.
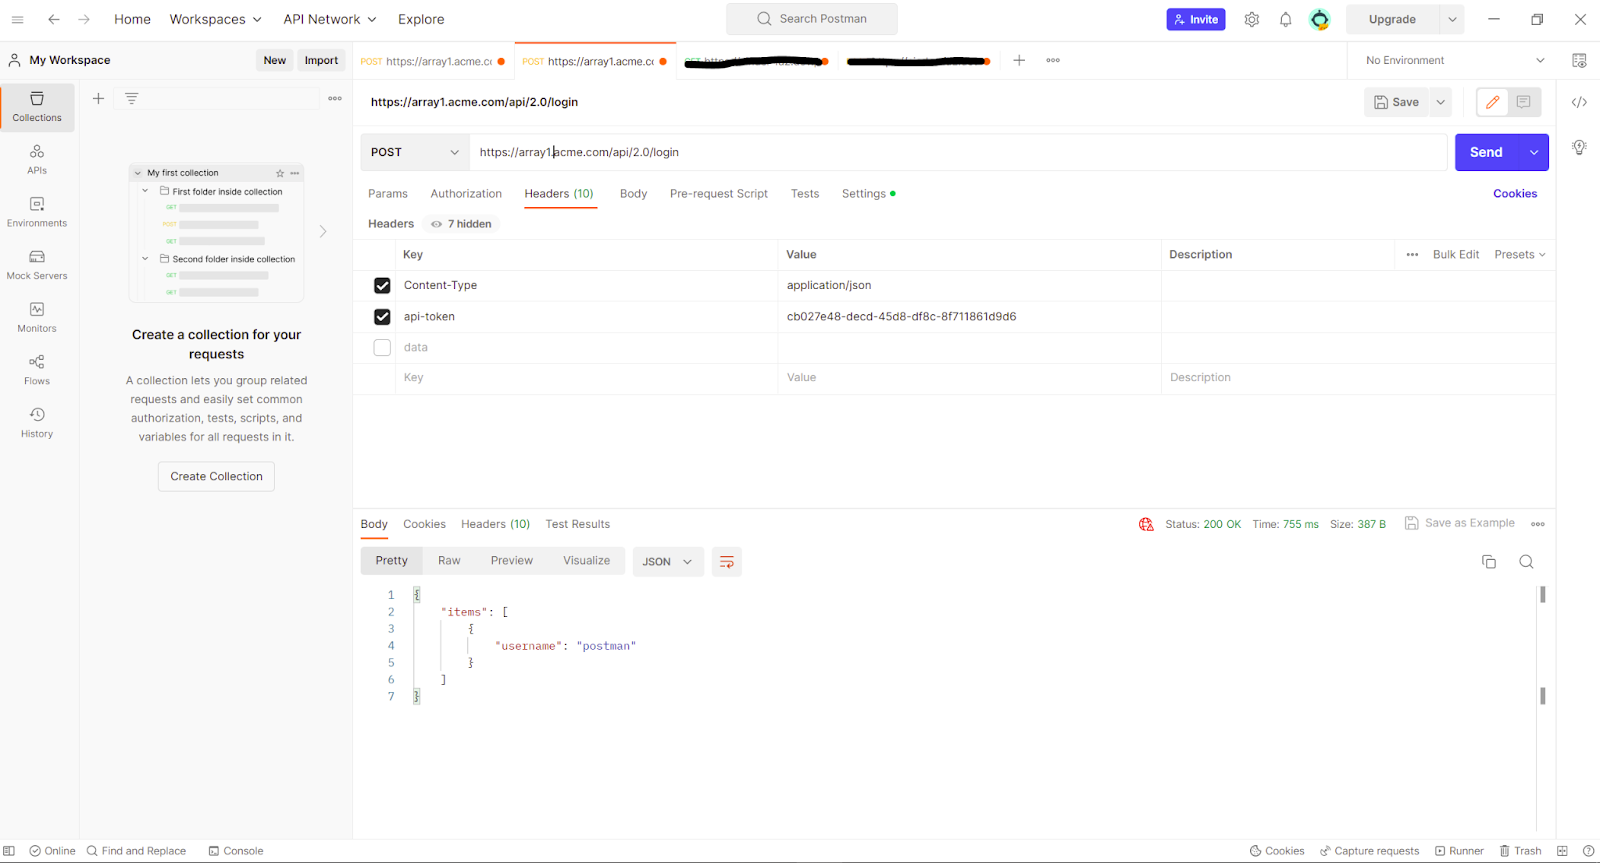
Sending the call will authenticate the request and the response body will confirm the username being used for the session.
The most important piece of information though can be found in the response Headers tab. This is x-auth-token. This is the session token for the user and will be used in all subsequent API calls to this FlashArray during this API session.
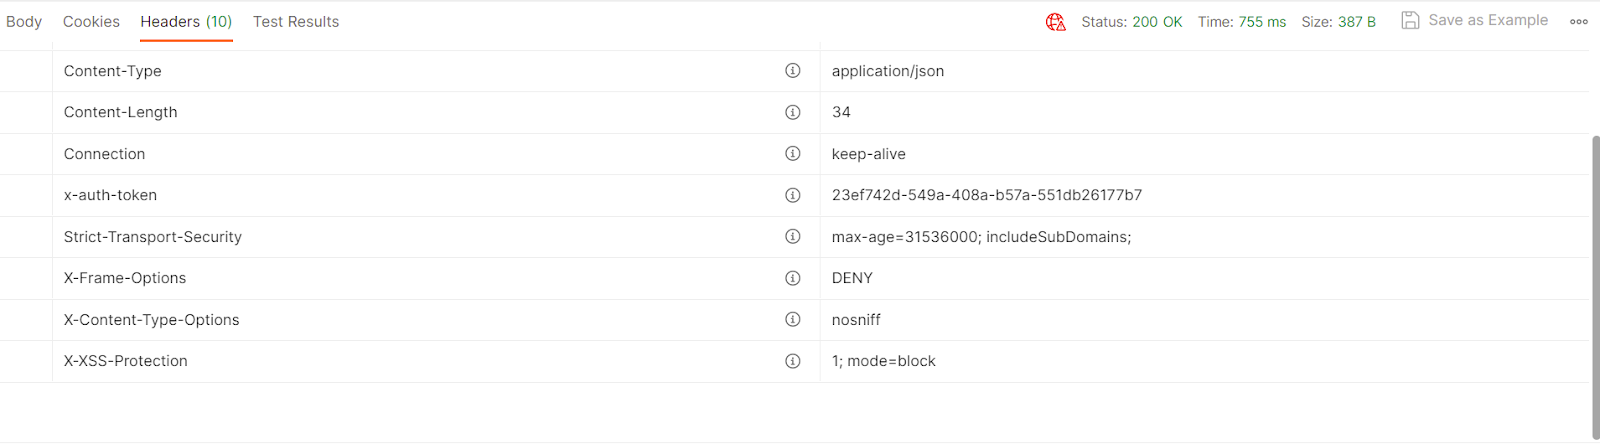
Now we have the session token, we can make any number of API calls to get data from the Flasharray or even manage and manipulate the array.
There are API endpoints to cover every feature of a FlashArray, although some only exist from specific REST 2 versions which correspond to the version of Purity where a specific feature was first enabled.
For example, setting the default Protection Group for a volume use the POST volume REST call, but the default group only became available from REST 2.16.
In general, however, you would normally call the endpoint using the latest REST version your FlashArray supports. If the version is too low for a specific feature you will get a failure message.
Now that we have a REST session open to the array, let’s see some of the actions we can perform.
Getting information from the FlashArray
Let’s start by getting a list of the host objects that exist on the FlashArray using
GET http://array1.acme.com/api/2.21/hosts
This call needs to be sent a few Header items, including the x-auth-token we obtained earlier; the session token.
Here you can see the specific headers that are required
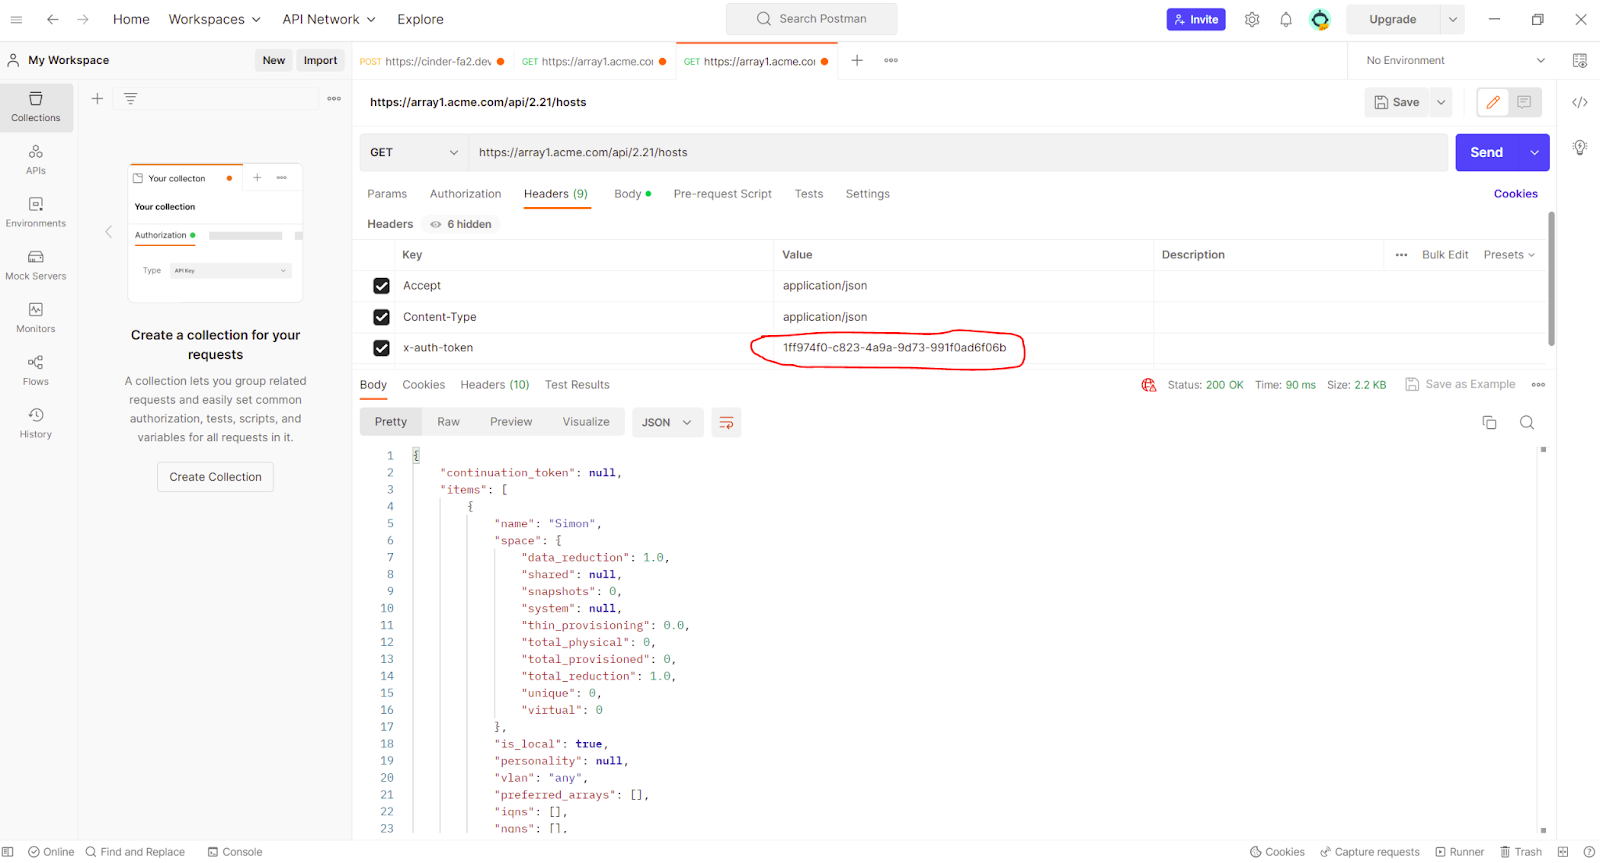
After selecting Send, the response body contains the list of host objects existing on the array.
Creating items on the FlashArray
Now you know where to send the x-auth-token in the API call Header, you can also create new objects on the FlashArray.
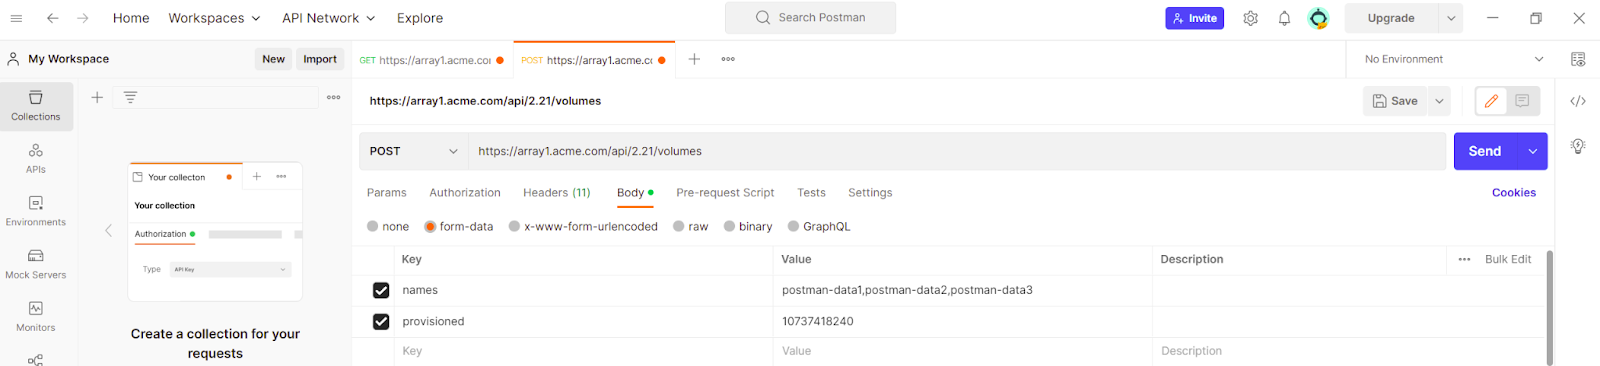
Let’s start by creating a few 10Gb volumes called postman-data[1-3] using
POST https://array1.acme.com/api/2.21/volumes
The size and names of the volumes are passed in the Body of the API call (along with the session token in the Header).
The following two screenshots show how the Header and Body are configured.

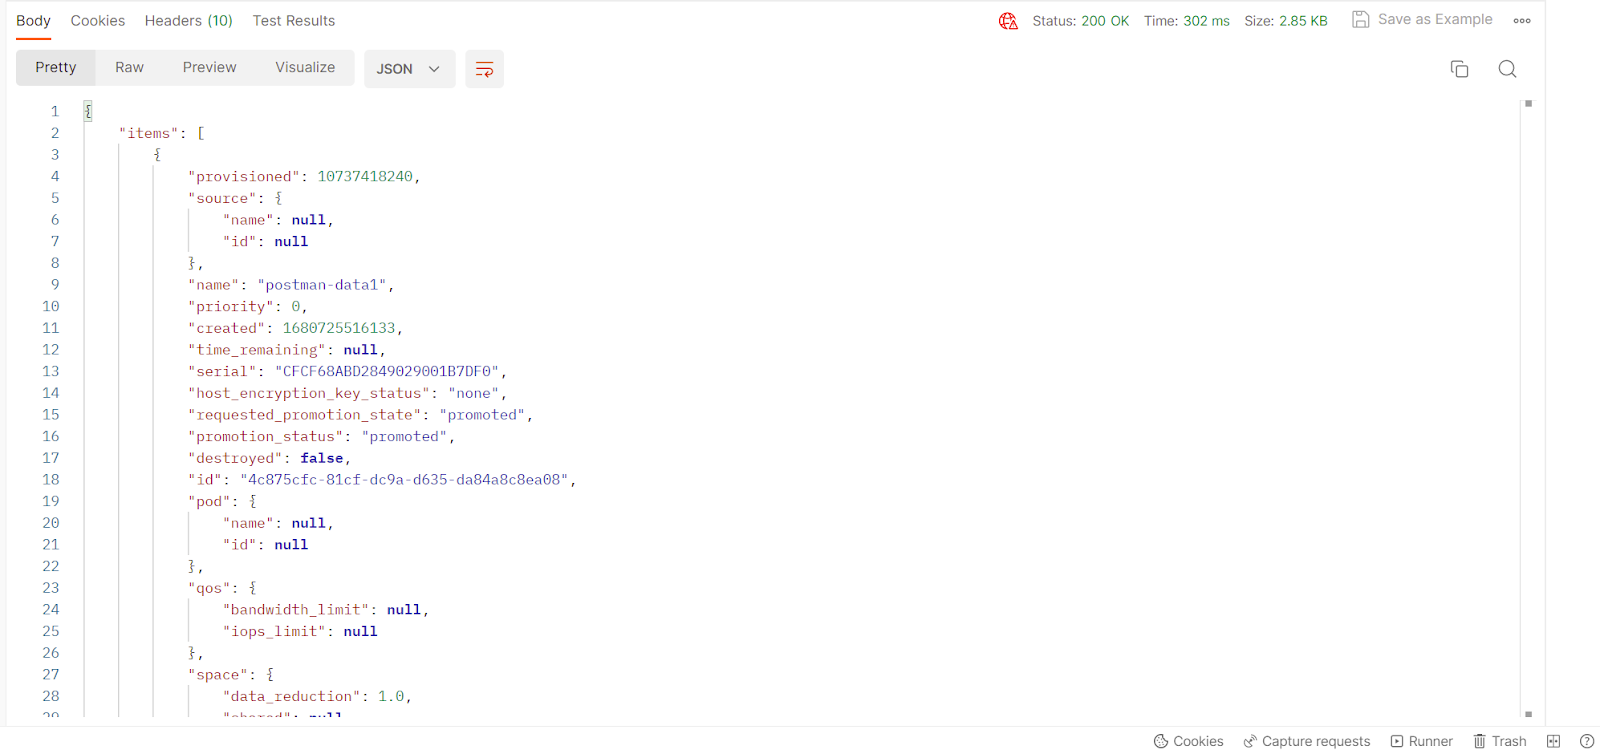
After the call is sent the response body shows great detail about each volume that has been created, not just the parameters that were sent in the call.
Changing items on a Flasharray
Now we’ll look at modifying objects or settings on a FlashArray. This time we’ll change some of the core configuration settings of a FlashArray. In this case, we will change the configured NTP servers to something different.
PATCH https://array1.acme.com/api/2.21/arrays
Again, it’s as simple as providing the correct information in the API body, which here is to provide a list of the new NTP servers. In most cases when sending complex parameters to the array, it is best to use the raw setting and supply actual JSON.
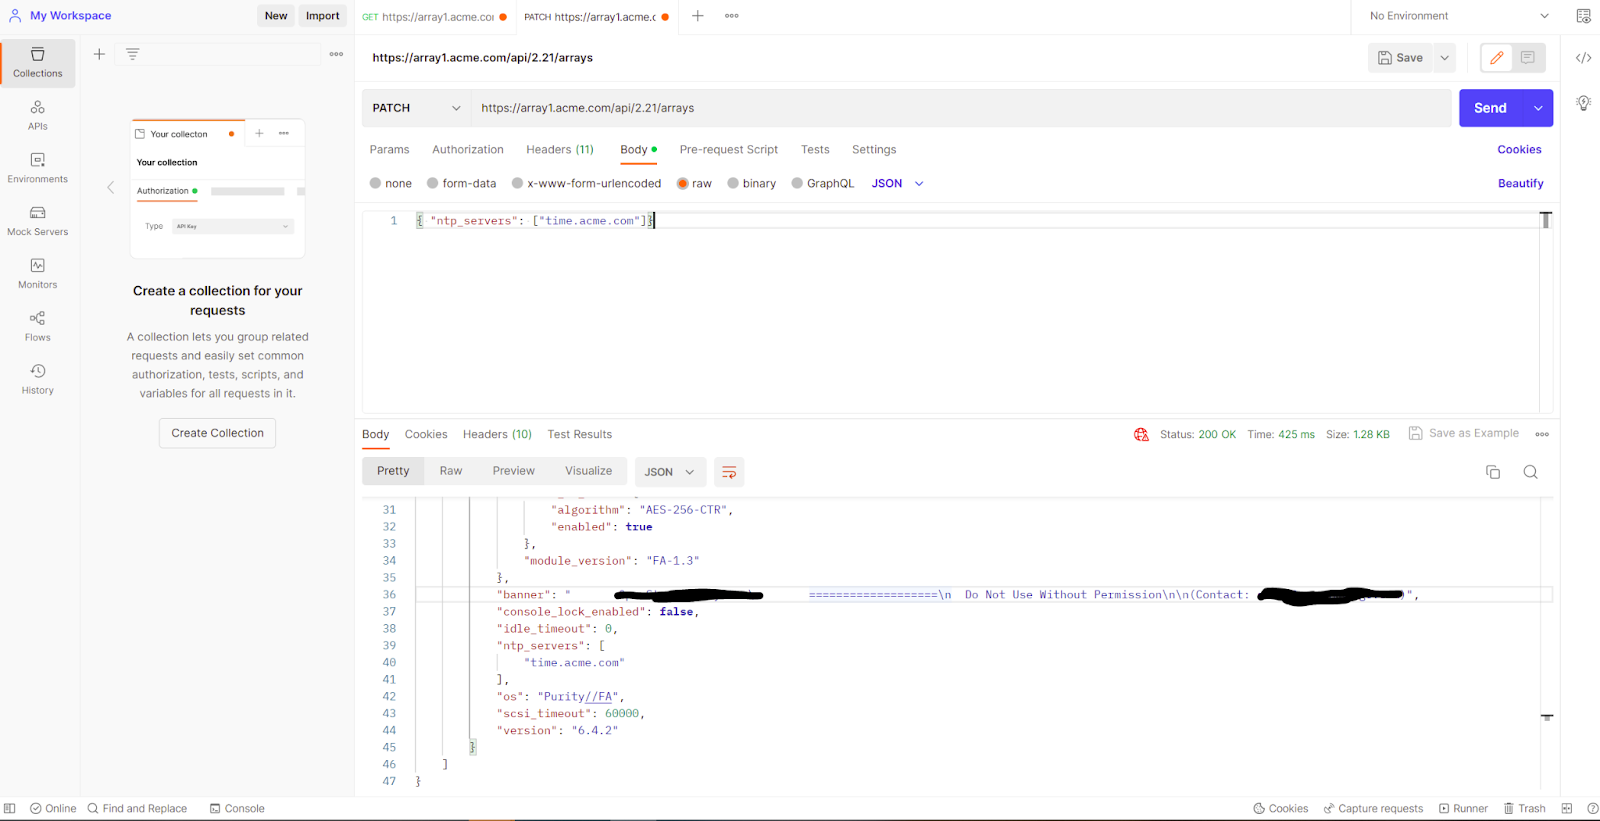
The response Body will show the new configuration settings.
Removing items on a FlashArray
Let’s clean up those three volumes we created earlier by using an API call to remove them.
PATCH https://array1.acme.com/api/2.21/volumes
Here we need to provide the volume names in the Body, but we also need to specify the destroyed boolean key as well. As above, it is best to use a JSON format to parse the Body:
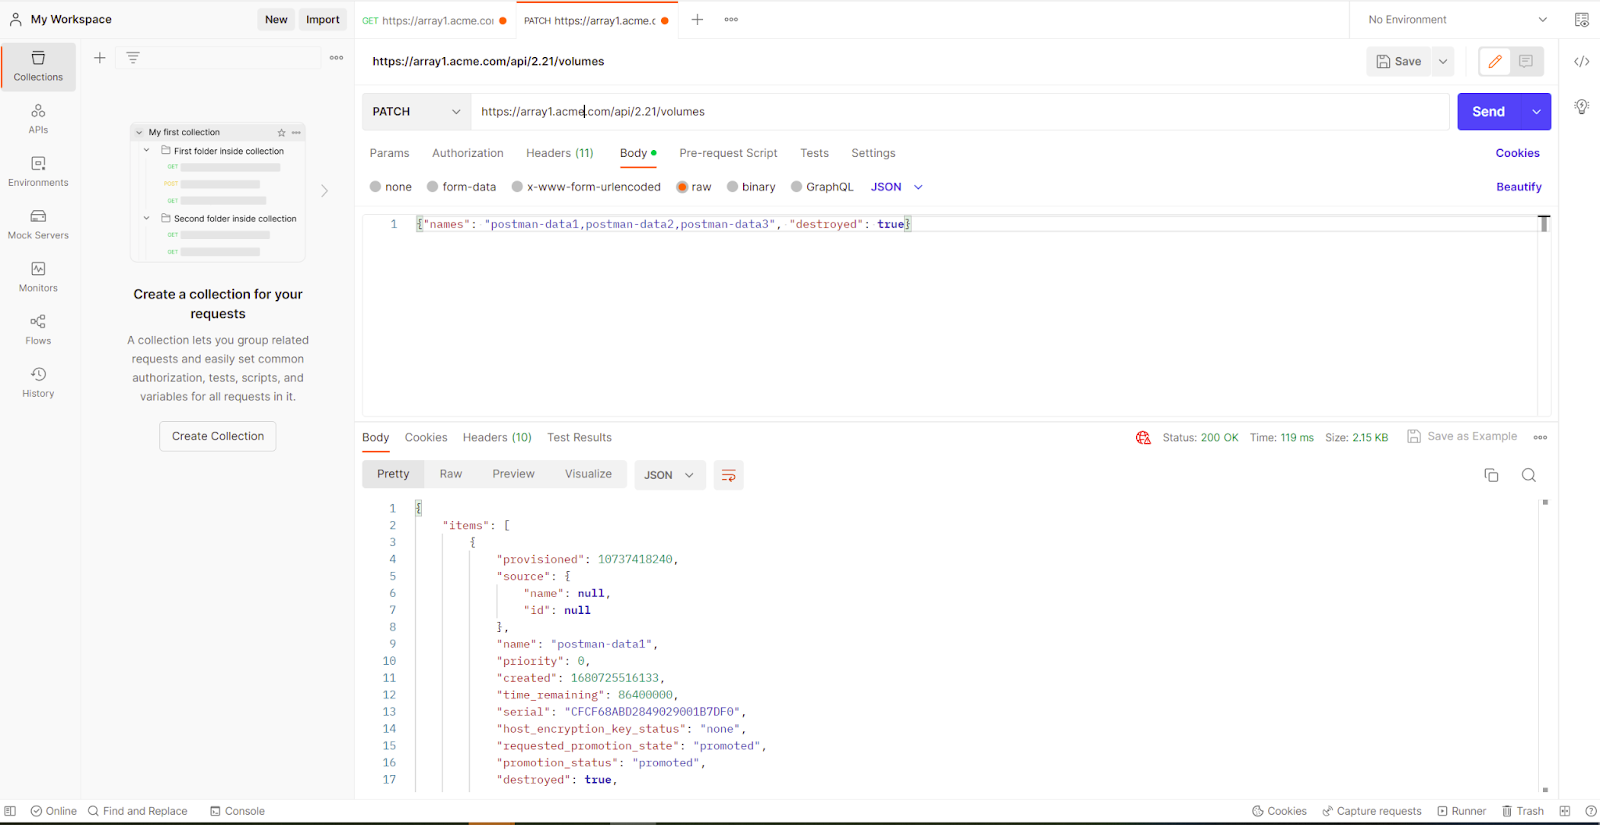
Remember that on a FlashArray, volumes, once deleted, reside in a trashcan to facilitate recovery within a system-wide window, defaulting to 24 hours. If you want to completely remove/eradicate the volumes from the FlashArray you will need to issue another API call of
DELETE https://array1.acme.com/api/2.21/volumes
Ending your API Session
Whilst the session token you have been using will eventually timeout, It is good practice to terminate your session cleanly once you have completed all your work.
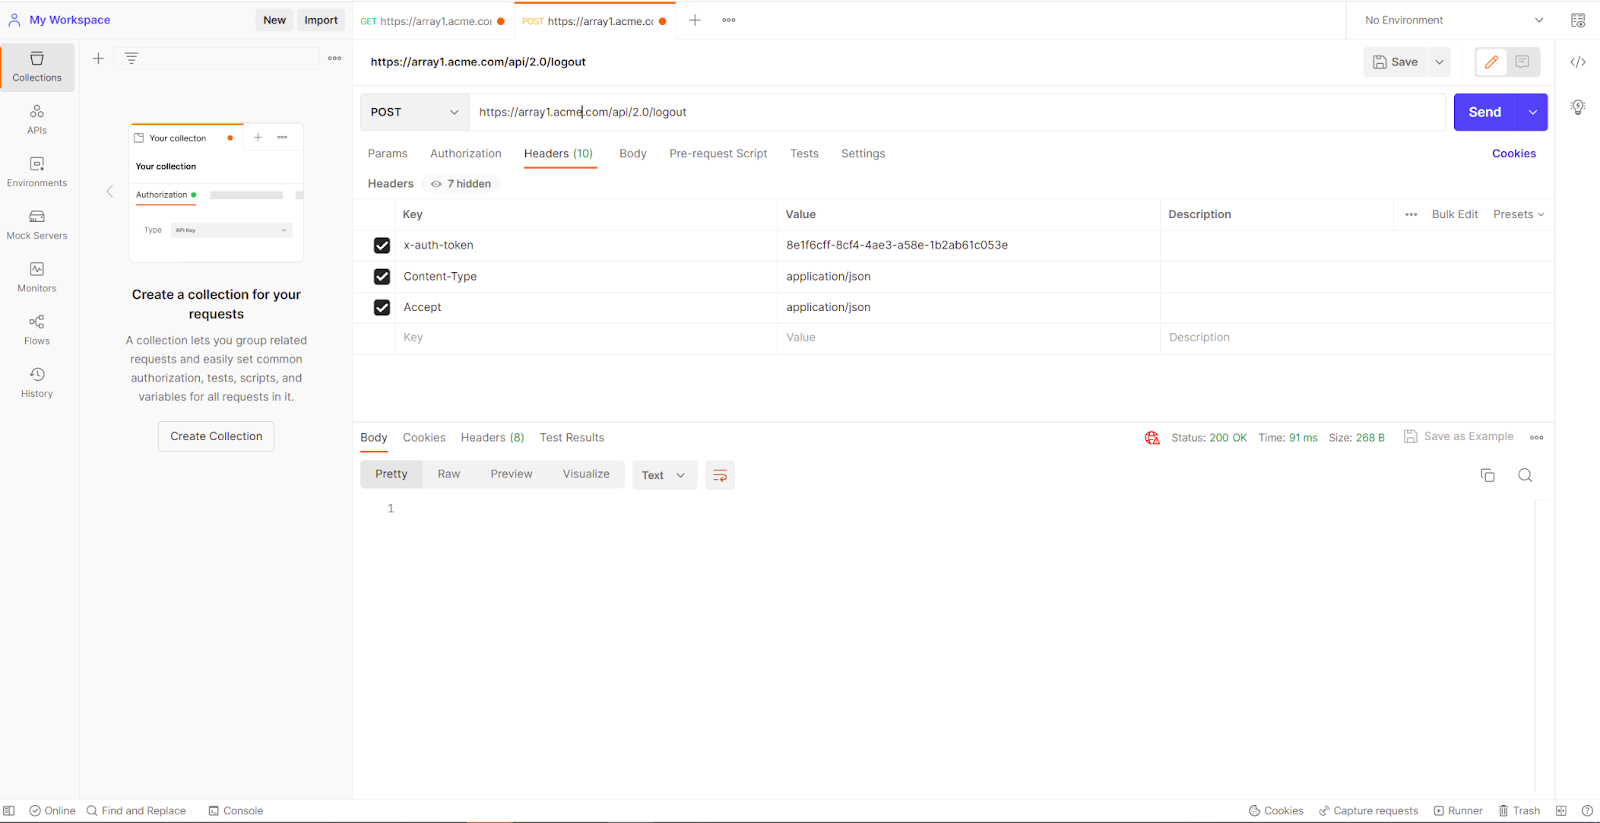
This is easily achieved by using the call
POST https://array1.acme.com/api/2.0/logout
Make sure you provide your current session token (x-auth-token) provided in the Header.
Next Steps
The above are only examples and many more REST calls can be made to a FlashArray.
If you want to see the full range of endpoints and actions, then download the Pure Storage Swagger UI, which you can run inside any Docker container. Or check out some example REST calls for FlashArray using different languages on the Postman website.
There is no limit to what you can do with direct REST calls, but remember that you have to ensure that any code you wrap around the calls will need to ensure that the calls are valid and that changes made to the underlying FlashArray are what you want… Data corruption and array destabilisation can occur if you don’t manage your calls correctly.